Generate Your First Tests
With your project data uploaded, you're ready to use TestFlair's AI to generate your complete testing suite. This guide walks you through the end-to-end generation flow.
Step 1: Generate User Stories
User stories are the foundation of your test coverage. TestFlair's AI analyzes your uploaded requirements and generates structured user stories.
- Navigate to the User Stories tab in your project
- Click Generate User Stories
- Wait for the AI to process your requirements
- Review the generated stories
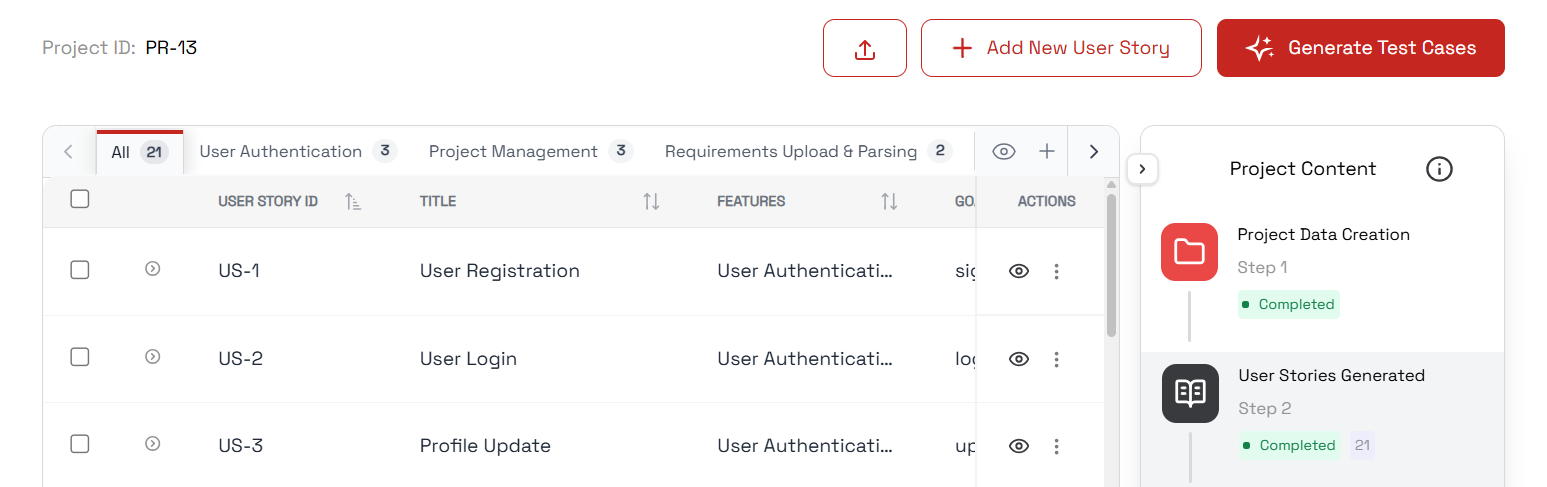
Each generated user story follows the standard format:
As a [user type], I want [action] so that [benefit]
The quality of generated user stories depends on the clarity of your uploaded requirements. More detailed input produces better results.
Step 2: Generate Test Cases
Once your user stories are ready, generate test cases from them.
- Navigate to the Test Cases tab
- Click Generate Test Cases
- The AI creates test cases covering your user stories
- Review the generated test cases
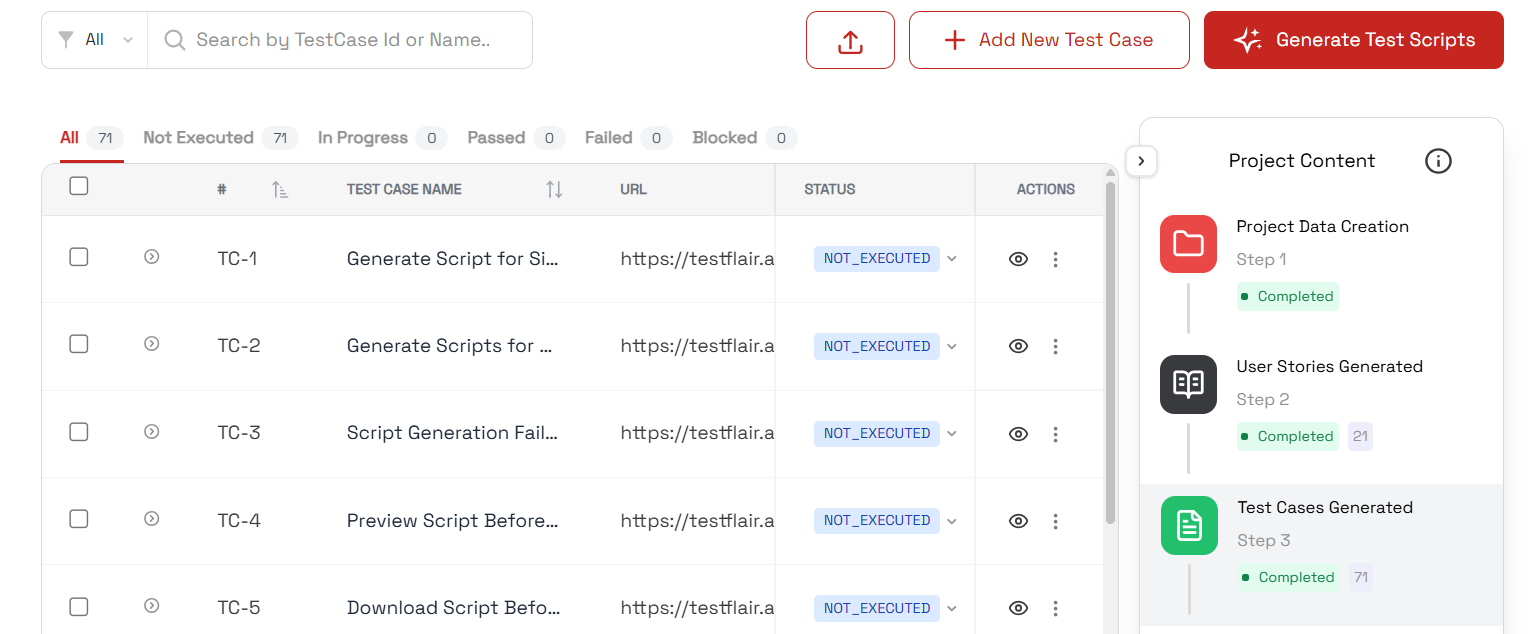
Each test case includes a title, preconditions, test steps with expected results, and a linked user story.
Step 3: Generate Test Scripts
Transform your test cases into executable automation scripts.
- Navigate to the Test Scripts tab
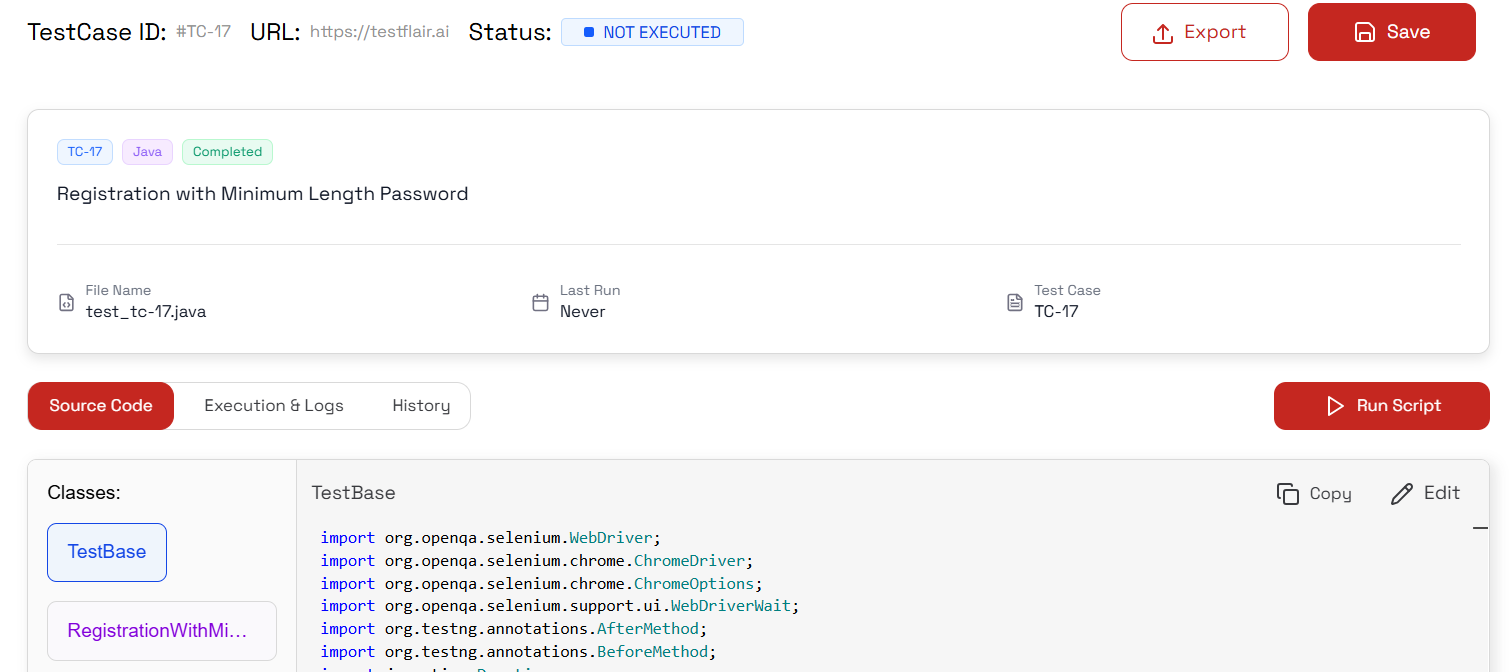
- Click Generate Test Scripts
- Choose the programming language and the automation framework (Selenium or Playwright)
- Wait for the AI to generate executable scripts
Step 4: Run Your First Test
Execute a test script directly from the platform.
- Select a test script from the list
- Enter the target URL of the application you want to test
- Click Run
- Watch the execution in real-time with live logs

If your application is running locally or behind a firewall, you'll need to set up a tunnel first. See the Test Execution page for tunnel setup instructions.
Step 5: Review Results
After execution completes:
- Passed tests are marked with a success indicator
- Failed tests show the failure details and screenshots
- Failed tests can automatically generate bug reports
What's Next
You've completed the getting started guide. Explore these sections to learn more:
- Dashboard — View statistics and track progress across projects
- User Stories — Learn about managing and editing user stories
- Test Cases — Explore test case filtering, editing, and bulk operations
- Bugs — Track and manage bugs found during testing